Users
In a user account, settings such as your name, permissions, and preferred language are stored. This chapter explains how to create an account and how to configure user permissions. You can find user accounts under the Users menu.

During the development of your website, it is determined whether users need to be organized into groups. Specific functions can then be assigned to each group. Since this may vary from one website to another, this topic will not be discussed further in this chapter.
# Overview page
Topics that have already been covered in the chapter General operation of the overview page are not described again here.
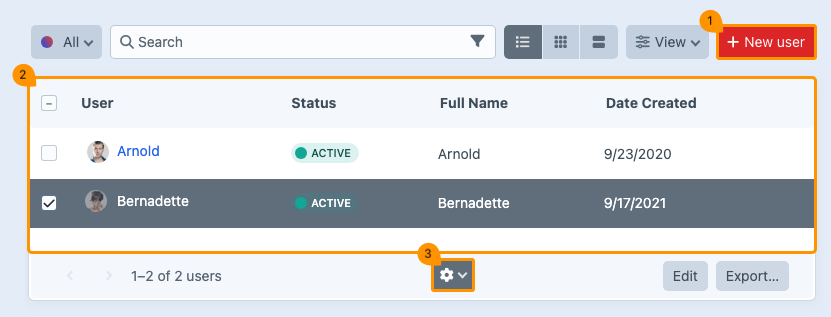
# Add new user
(regarding block 1)
Click New User.

You will start with the first section, Profile.
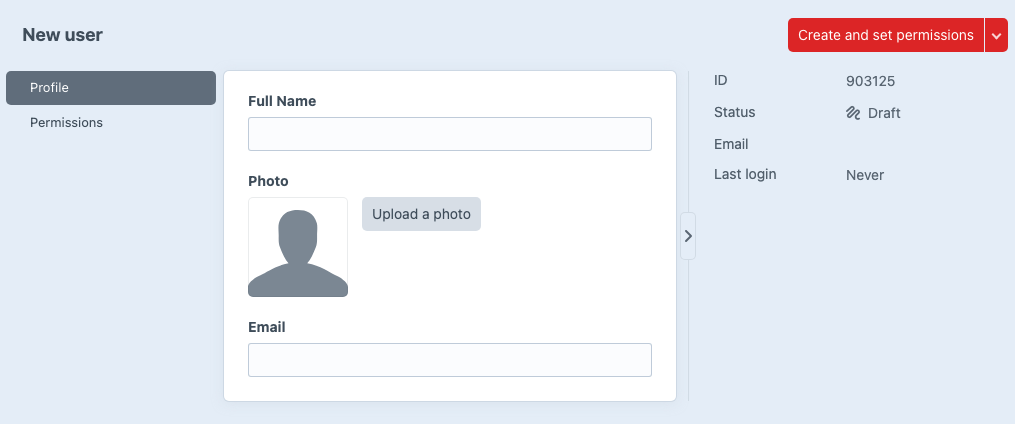
- Enter the full name.
- Upload a profile picture (optional).
- Enter the user’s email address.
- Click Create and set permissions.
You will now automatically proceed to the next step, Permissions.
For security reasons, the system asks for your password to confirm your identity.
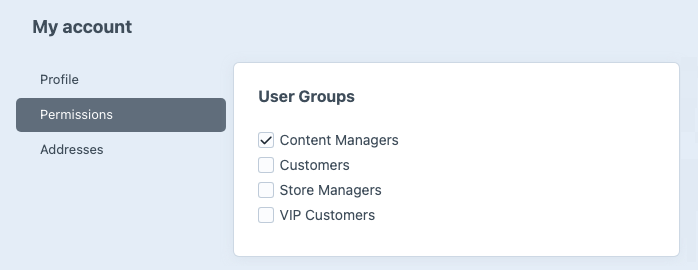
# Permissions
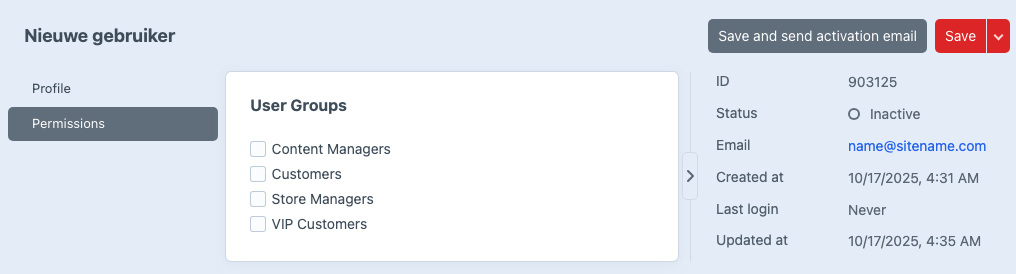
- Select the user group to which the user belongs and configure the corresponding permissions.
- Click Save and send activation email.
The new user will then receive an email containing an activation link and a request to set a password. Once these steps have been completed, the account becomes active.
If you do not want to send the activation email yet, click Save after step 1. In that case, the user will remain inactive.
During the development of your site, the developer determines which types of users are required. These may differ from one website to another.
# Edit existing user
(regarding block 2)
If necessary, you can modify a user’s settings at a later stage. This applies, for example, to the email address, permissions, or login details. To do so, go to the overview page in the Users menu and click the name of the user whose settings you want to change.
# Gear menu
(regarding block 3)
When you select one or more users on the overview page, a menu with a gear icon appears at the bottom center of the screen. The selected option will then apply to all chosen entries.

| Function | Description |
|---|---|
| Edit user | Go to the user’s detail page to edit their information. |
| Duplicate | Copies a user. |
| Suspend | Blocks a user’s access to the system. |
| Unsuspend | Restores a user’s access to the system. |
| Delete | Deletes the user from the system. |
When you select multiple files at the same time, some options in the drop‑down menu may not be available, as certain actions cannot be performed in bulk.
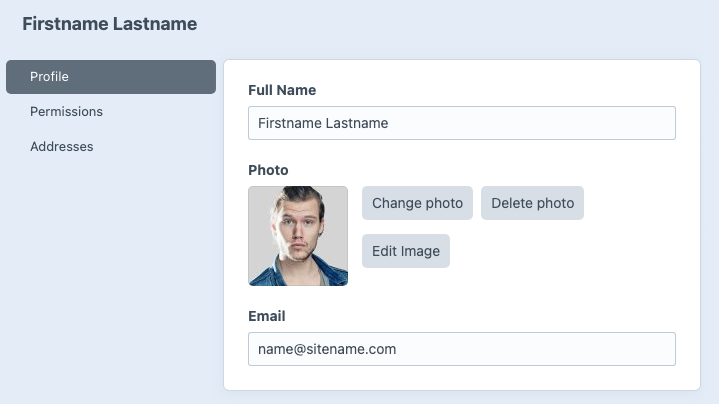
# Detail page
Click the name of a user to open the detail page. You will be taken directly to the first menu item, Profile.
# Profile
In the Profile menu, you can edit user information such as the name, image, and email address.
# Permissions
In the Permissions menu, you can specify which group a user belongs to. The permissions configured for this group by your website developer are then applied automatically.
During the development of your site, the developer determines which types of users are required. These may therefore differ from one website to another.
# Preferences
The Preferences menu is divided into two sections: general settings and accessibility settings.
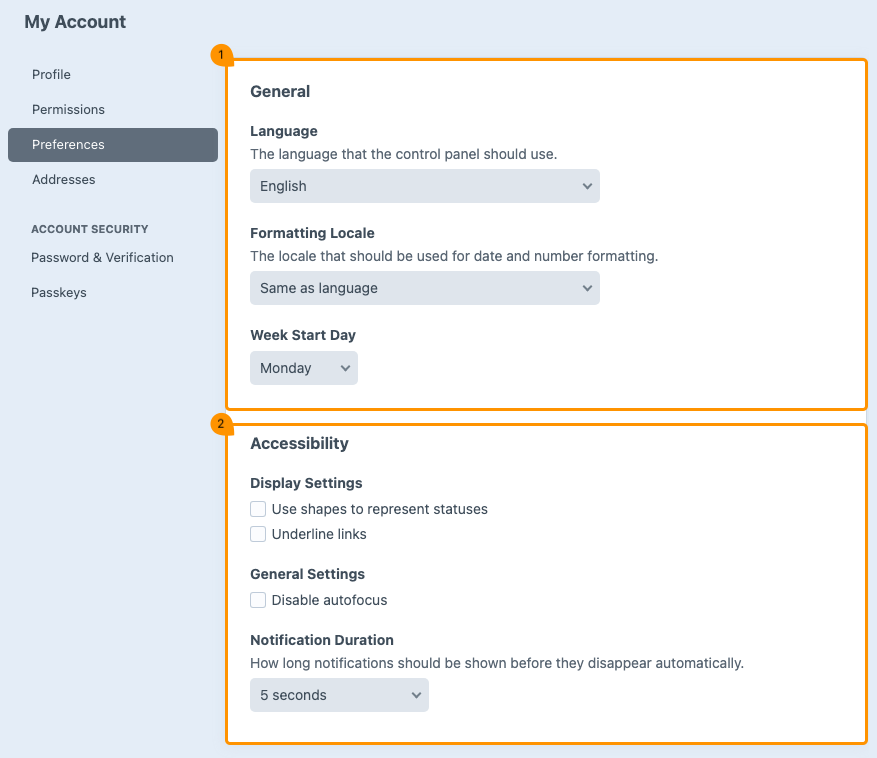
# General settings
(regarding block 1)
| Function | Description |
|---|---|
| Language | Set the language for the backend. |
| Formatting Locale | Specify when you want to use a different formatting for a selected language. For example, the language may be set to English (US), but the formatting to Dutch. In that case, the backend interface is displayed in English, while thousands are separated by a period (instead of a comma) and the euro symbol is used (instead of the dollar symbol), and so on. |
| Week Start Day | Set the day on which the week should start. |
Language settings in this menu apply only to the backend and are therefore not visible to website visitors.
# Accessibility settings
(regarding block 2)
| Function | Description |
|---|---|
| Display Settings | Set which element the system should highlight. |
| Disable autofocus | Set when you do not want the system to display a blue border around a field in the backend. This prevents the focus from being visually highlighted when, for example, you navigate to the next field using the TAB key.  |
| Notification Duration | Adjust when you want notifications to remain visible for a longer period of time. |
# Addresses
In the Addresses menu, you can add new addresses or edit existing ones for each user.
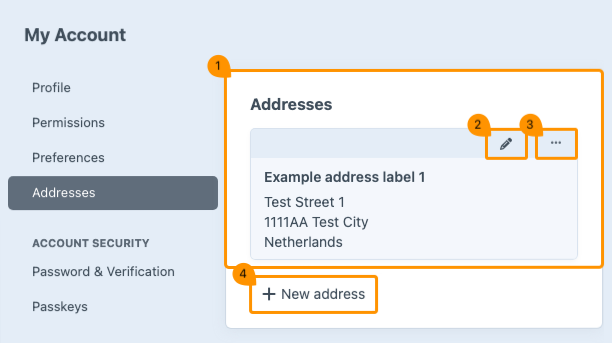
| Function | Description |
|---|---|
| Address label | All address labels used by a specific user are displayed here. |
| Edit | Use the pencil icon to edit existing information. |
| Options menu | Additional menu with options to duplicate, copy, or delete an address label. |
| Cell 1 | It is possible to create multiple address labels per user. Click New address to add one. |
# Password & Verification
In the Password & Verification menu, you can change passwords or configure additional security measures.
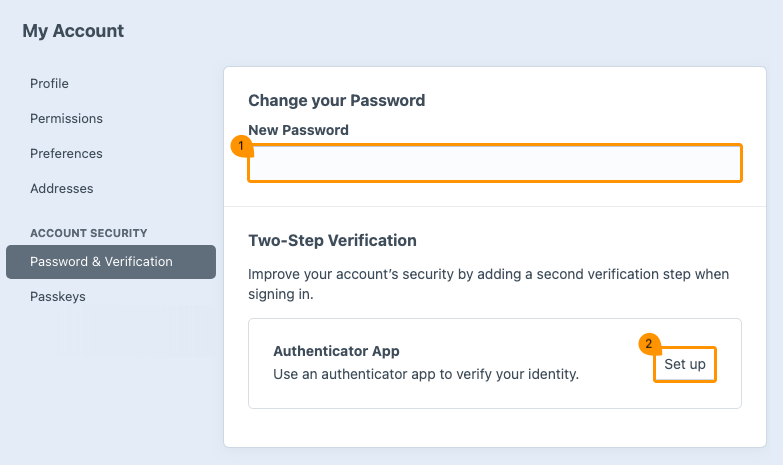
# Change your password
(regarding block 1)
Enter the new password and click Save to store it. A confirmation message will appear at the bottom left of the page.

# Two-Step Verification
(regarding block 2)
Two‑step verification is an additional security layer for your account. In addition to your password, a second step is required: a unique code generated by an app. This code is requested after you have entered your password. This way, your account remains better protected, as logging in is not possible without both the password and the unique code.
- Click Set up.
- The system will ask for your password to confirm your identity.
- Follow the steps to install an app, if necessary.
- Scan the QR code or enter the key.
- The app will immediately generate a six‑digit code. After entering the code, a message will appear confirming that two‑step verification has been activated.
Remove any spaces from the key if your app does not accept them.
If necessary, two‑step verification can be removed. This option can be found in the options menu.

After setting up two‑step verification, you can generate recovery codes. These are single‑use codes that can each be used only once. In case of emergency — for example, if you are unable to generate a code through the app — you can enter one of these codes instead. This works in the same way as the code normally generated by the app.
- Click Set up.
- The system asks for your password and two‑step verification code to confirm your identity.
- Click Generate Recovery Codes.
- Copy or download the list of codes.

# Passkeys
A passkey is a secure and modern way to log in without a password and can be set up through the Passkeys menu. You confirm your identity using your fingerprint, facial recognition, or a PIN code through technology that relies on cryptography.
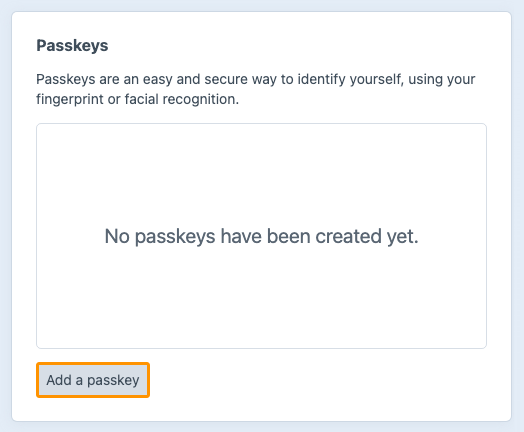
- Click Add a passkey.
- Enter your password to confirm your identity.
- Enter a name for the passkey and confirm by clicking OK.
- If you do not want to store the passkey in your browser but, for example, in a password manager, select Save another way. Otherwise, click Continue.
- Confirm the addition of the passkey. This confirmation is usually done through biometric authentication, such as your fingerprint or facial recognition.
- Repeat these steps if you want to add multiple passkeys.
Using a passkey allows you to log in more easily and securely than with a password and two‑step verification. This method is therefore recommended.
If necessary, the passkey can be removed. This can be done by clicking the cross icon next to the name of your passkey.

# Options menu
Through the Options menu, you can perform specific actions for each user. You can open this menu on a user’s detail page by clicking the button with the three horizontal dots in the top‑right corner of the screen.
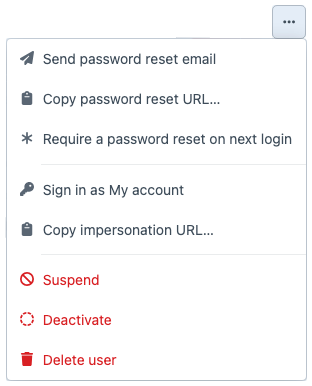
| Function | Description |
|---|---|
| Send password reset email | Send the user a password reset email. |
| Copy password reset URL... | Send the user a link to reset the password. |
| Require a password reset on next login | Forces a password reset for the user. |
| Sign in as Name User | Log in as the user. This can be useful, for example, to test what a user sees. |
| Copy impersonation URL... | Link to log in as the user. NOTE: Anyone who has access to this link will be logged in immediately without needing a password. |
| Suspend | Temporarily block a user or lift the suspension. |
| Deactivate | Disable the user’s account. The user will then no longer be active within the system. |
| Delete user | Delete the user. You can choose to retain the content and transfer it to another user, or to permanently delete the content.* 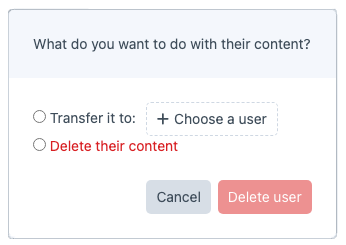 |
*We recommend always choosing the Transfer it to option. Deleting will permanently remove the content and cannot be undone.